

FHD 1080p dash cams are becoming essential for modern drivers, offering peace of mind and potential evidence in unforeseen incidents.
This guide, referencing product manuals and reviews, will help you understand and utilize your new device effectively, ensuring optimal performance and safety.
From unboxing to advanced features, we’ll cover everything you need to know about your dash cam, like the Gator GHDVR82W or OMBAR DC42.
What is a Dash Cam?
A dash cam, or dashboard camera, is a small, typically windshield-mounted device that continuously records the view through a vehicle’s front window. Full HD 1080p dash cams, like the Gator GHDVR82W, capture high-resolution video, providing clear footage for documentation.
These devices function as an independent witness, automatically recording events while driving. They are invaluable for capturing accidents, road rage incidents, or even scenic drives. Reviewing the manual is crucial for understanding specific features.
Benefits of Using a 1080p Dash Cam
Utilizing a 1080p dash cam offers numerous advantages, primarily providing crucial evidence in the event of an accident. Clear footage can help resolve disputes and support insurance claims. Features like loop recording, detailed in the manual, ensure continuous monitoring.
Beyond accident recording, they deter theft and vandalism, and some, like the OMBAR DC42, offer parking mode. Ultimately, a dash cam enhances driver safety and provides peace of mind on every journey.

Unboxing and Package Contents
Carefully unpack your FHD 1080p dash cam, referencing the included manual to identify all components. Ensure all listed items are present before proceeding with setup.
Identifying the Components
Upon opening the package, locate the dash cam unit itself, typically a compact device with a lens and mounting bracket. You should also find a car power adapter – either a cigarette lighter plug or hardwiring kit – and a USB cable for data transfer.
Many kits include a suction cup mount, cable clips for tidy installation, and potentially a rear camera (for dual-channel models). The manual will provide a detailed diagram illustrating each component, ensuring you understand what everything is for before installation.
Checking for Damage
Before proceeding with installation, carefully inspect all components for any signs of shipping damage. Examine the dash cam unit for cracks or dents, and verify the lens is clean and free of scratches.
Test the power adapter and USB cable with another device to confirm functionality. If any damage is present, immediately contact the retailer or manufacturer – referencing your manual for warranty information – to arrange a replacement. Do not attempt to use a damaged device.

Installation and Setup
Proper installation is crucial for optimal performance. This section details mounting options, power connections (cigarette lighter or hardwiring), and initial configuration steps.
Refer to your manual for specific instructions tailored to your FHD 1080p dash cam model.
Mounting the Dash Cam
Securely mounting your FHD 1080p dash cam is paramount for clear footage. Most models utilize a suction cup or adhesive mount, attaching to the windshield.
Ensure the lens has an unobstructed view of the road, avoiding obstructions like mirrors or tinting.
Positioning should be high enough to capture the scene but not impede your vision.
Carefully follow the manual’s instructions for your specific model, as improper mounting can lead to the device falling or a compromised view.
Power Connection Options (Cigarette Lighter vs. Hardwiring)
FHD 1080p dash cams typically offer two power options: cigarette lighter and hardwiring. The cigarette lighter is a simple plug-and-play solution, ideal for quick setup.
However, it can leave a visible cable and the cam shuts off with the ignition.
Hardwiring connects directly to the vehicle’s electrical system, enabling parking mode functionality.
Consult your manual for proper hardwiring procedures, as incorrect installation can damage your vehicle’s electrical system;
Initial Configuration (Date, Time, Language)
Upon powering on your FHD 1080p dash cam, accurate date and time settings are crucial for event recording. Access the settings menu, usually via buttons, to configure these.
Ensure the time zone is correctly set for precise timestamps on footage.
The language option allows you to customize the interface for ease of use.
Refer to your device’s manual for specific navigation instructions, as menu structures vary between models.
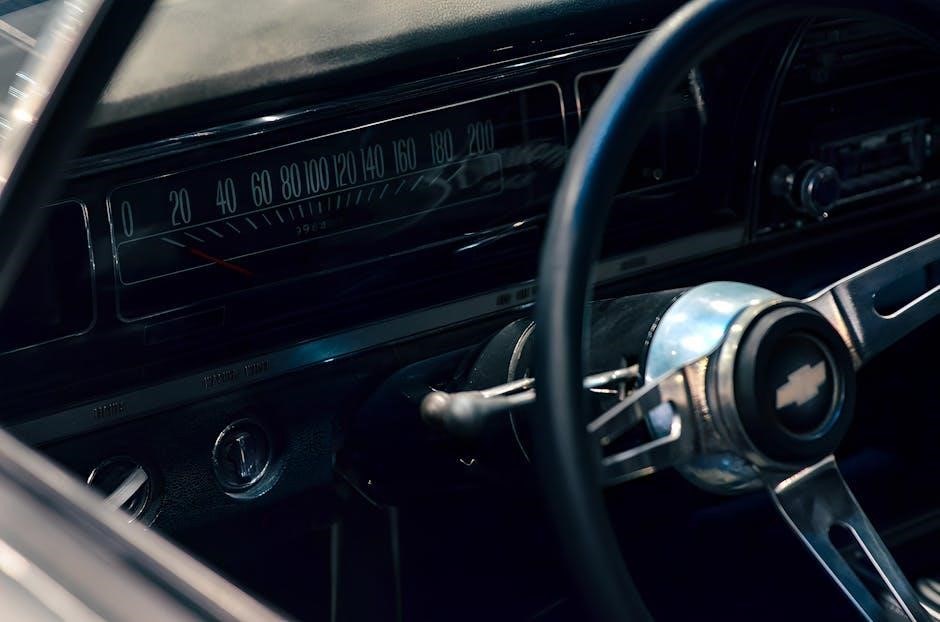
Understanding the Dash Cam Interface
The dash cam interface features buttons for navigation and a display showing recording status.
Menu settings control recording options, while indicators display power, recording, and memory card status.
Button Functions and Navigation
Dash cam buttons typically include a power button for turning the device on and off, and a menu button for accessing settings.
Up, down, left, and right buttons navigate the menu options, allowing adjustments to resolution, loop recording, and G-sensor sensitivity.
An ‘OK’ or confirmation button selects options, while a dedicated record button may initiate manual recording. Refer to your specific manual for detailed button mapping, as layouts vary between models like the OMBAR DC42.
Understanding these controls is key to efficient operation.
Menu Settings Overview
The dash cam menu allows customization of recording parameters. Key settings include video resolution (1080p is standard), loop recording duration, and G-sensor sensitivity for impact detection.
Date and time adjustments are crucial for accurate event logging.
Other options often include display settings, audio recording control, and WiFi configuration for smartphone connectivity, as seen in models like the Gator GHDVR82W.
Consult your manual for a complete list and detailed explanations of each setting.
Display Indicators and Symbols
The dash cam display uses various indicators to show operational status. A flashing red dot typically signifies recording is active. A lock icon indicates an event file, protected by the G-sensor.
Low battery or memory card full warnings are also common.
WiFi connectivity is usually shown with a specific icon. Refer to your manual – like those for the Gator GHDVR82W – for a comprehensive list and explanation of all symbols, ensuring proper understanding of the device’s state.

Recording Features
Dash cams offer continuous, event-triggered, and manual recording modes. Loop recording overwrites older footage, while the G-sensor secures event files for critical moments.
Recording Modes (Continuous, Event, Manual)
Dash cams typically feature three primary recording modes. Continuous recording constantly captures footage while driving, ensuring incidents are recorded without needing activation. Event recording, triggered by the G-sensor, automatically saves footage upon impact or sudden braking.
Manual recording allows you to directly initiate and stop recording as needed, useful for capturing specific events or scenery. Understanding these modes, as detailed in your manual, is crucial for effective use.
Loop Recording Explained
Loop recording is a vital feature in FHD 1080p dash cams, automatically overwriting the oldest footage when the memory card reaches full capacity. This ensures continuous recording without manual intervention.
Your dash cam manual will detail how to adjust the loop recording segment length (e.g., 1, 3, or 5 minutes). Event files, protected by the G-sensor, are typically excluded from loop overwriting, preserving critical incident footage.
G-Sensor Functionality and Event Files
The G-sensor, or gravity sensor, detects sudden impacts or movements, like a collision or hard braking. Upon detection, your FHD 1080p dash cam automatically locks and saves the current footage as an “event file.”
These files are protected from being overwritten by loop recording, ensuring crucial evidence is preserved. Consult your dash cam manual to adjust the G-sensor sensitivity level for optimal performance and to locate event files on your memory card.
Video Resolution and Quality
FHD 1080p resolution delivers clear and detailed footage. Adjusting quality settings within your dash cam’s manual impacts file size and clarity, balancing storage and visual fidelity.
Understanding 1080p Resolution
1080p resolution, or Full High Definition, signifies 1920×1080 pixels, offering a significant improvement over 720p; This higher pixel count translates to sharper, more detailed video footage, crucial for capturing license plates and identifying objects.
Refer to your dash cam’s manual for specific details on its sensor and lens quality, as these factors also influence the final image. While 1080p is standard, some cameras offer higher resolutions like 4K, but require larger storage capacity.
Understanding these specifications helps maximize your dash cam’s potential.
Adjusting Video Quality Settings
Most FHD 1080p dash cams allow you to customize video quality. Consult your device’s manual to access these settings, typically found within the menu. Options often include resolution, bitrate, and exposure adjustments.
Higher bitrates result in larger file sizes but improved detail. Experiment with these settings to find a balance between quality and storage capacity. Some cameras offer different quality levels – low, medium, and high – for convenience.
Proper adjustment ensures optimal footage.
Factors Affecting Video Clarity
Several factors impact your FHD 1080p dash cam’s video clarity. Lens cleanliness is crucial; regularly wipe away dust and smudges. Lighting conditions significantly affect footage – low light necessitates a camera with a wide aperture (like F1.8).
Windshield quality and obstructions also play a role. Ensure the view isn’t blocked. Finally, the memory card’s write speed impacts recording smoothness; use a high-quality, fast microSD card as recommended in the manual.
Memory Card Requirements
Your FHD 1080p dash cam requires a compatible microSD card for recording. Consult your manual for supported types and recommended capacities to ensure optimal performance.
Formatting is essential!
Compatible MicroSD Card Types
Dash cams typically support microSD, microSDHC, and microSDXC card formats. Refer to your specific dash cam manual for confirmed compatibility, as some models have limitations.
Crucially, ensure the card meets the required speed class; Class 10 or UHS-I U3 are generally recommended for 1080p recording to handle the continuous data writing.
Avoid counterfeit cards, as they often fail prematurely or perform inconsistently, potentially losing crucial footage. Always purchase from reputable retailers.
Recommended Memory Card Capacity
For a 1080p dash cam, a 32GB to 64GB microSD card is generally sufficient for several hours of recording, depending on resolution and frame rate settings.
Larger capacities, like 128GB or 256GB, provide extended recording time and are beneficial if you frequently use parking mode or require longer event file storage.
However, ensure your dash cam supports the larger capacity before purchasing, consulting the device’s manual for maximum supported size.
Formatting the Memory Card
Properly formatting your microSD card is crucial for optimal dash cam performance. Use the formatting option within the dash cam’s menu system – do not format on your computer.
This ensures compatibility with the device’s file system. Formatting clears all data, so back up any important files beforehand.
Refer to your manual for specific formatting instructions, as procedures may vary slightly between models. Regular formatting maintains recording reliability.

Connectivity and Data Transfer
Many FHD 1080p dash cams offer WiFi connectivity and smartphone app integration for easy footage access. Alternatively, use a USB cable for direct data transfer to your computer.
WiFi Connectivity and Smartphone App
Dash cams with WiFi allow seamless connection to your smartphone via a dedicated app. Download the app (specific to your model) and follow the on-screen instructions to pair the devices.
Once connected, you can view live footage, download recordings directly to your phone, adjust settings, and share clips easily.
This eliminates the need for removing the microSD card for footage access, offering convenient control and management of your dash cam recordings.
USB Data Transfer to Computer
Connecting your dash cam to a computer via USB cable allows for direct footage transfer. Power off the cam before connecting.
Your computer should recognize the device as a removable drive. Navigate to the drive to access the video files, typically stored in a DCIM or similar folder.
Copy the desired files to your computer for archiving or sharing. Ensure safe ejection of the device before disconnecting the USB cable.
Viewing and Downloading Footage
Footage can be viewed directly on the dash cam’s screen, or transferred to a computer for larger display and storage.
After USB connection, locate the video files on the removable drive, usually within a DCIM folder. Select and copy the desired clips to your computer.
Smartphone app connectivity, if available, offers convenient viewing and download options directly to your mobile device, streamlining the process.

Advanced Features
Many FHD 1080p dash cams offer parking mode, speed/GPS logging, and ADAS features like lane departure warnings, enhancing safety and providing detailed driving data.
Parking Mode Operation
Parking mode allows your dash cam to continue recording while your vehicle is parked, providing surveillance against hit-and-runs or vandalism.
Typically, this utilizes the G-sensor to detect impacts or motion, triggering recording.
Some models require a hardwiring kit for continuous power, preventing battery drain.
Review your manual for specific settings, as parking mode can be time-limited or event-triggered, and may not function in extreme temperatures.
Ensure proper setup to avoid battery issues.
Speed and GPS Logging (if applicable)
If your FHD 1080p dash cam includes GPS, it can log your vehicle’s speed and location during recordings.
This data is often overlaid onto the video footage, providing valuable context in the event of an incident.
Refer to your manual to activate and configure the GPS functionality.
Ensure a clear view of the sky for optimal signal reception.
GPS data can be accessed via the dash cam’s software or a connected smartphone app.
ADAS (Advanced Driver-Assistance Systems) Features
Some FHD 1080p dash cams offer ADAS features, enhancing driver safety. These may include Lane Departure Warning (LDW), Forward Collision Warning (FCW), and Front Vehicle Detection.
Consult your manual for specific ADAS capabilities and calibration instructions.
These systems use the camera to analyze the driving environment and provide alerts.
Accuracy can vary based on conditions; ADAS should not replace attentive driving.
Ensure the windshield is clean for optimal performance.
Troubleshooting Common Issues
If your dash cam isn’t powering on, check the power connection and fuse. Recording errors or WiFi problems? Consult the manual for solutions!
Dash Cam Not Powering On
If your FHD 1080p dash cam fails to power on, begin by verifying the power cable connection to both the device and the power source – cigarette lighter or hardwiring kit.
Inspect the fuse within the cigarette lighter adapter; a blown fuse is a common culprit.
For hardwired installations, confirm the connection to the vehicle’s fuse box is secure and the correct fuse is functioning.
Consult your dash cam manual for specific fuse ratings and wiring diagrams.
Test the power source with another device to rule out a faulty outlet.
Recording Issues and Errors
If your FHD 1080p dash cam experiences recording issues, first ensure a compatible and properly formatted microSD card is inserted – check your manual for specifications.
Verify sufficient storage space remains on the card. Corrupted files or a full card can cause errors.
Check the lens for obstructions like dirt or smudges.
Review the dash cam’s settings; incorrect date/time or loop recording settings may contribute to problems.
A firmware update, as outlined in the manual, might resolve software-related glitches.
WiFi Connection Problems
Experiencing WiFi connectivity issues with your FHD 1080p dash cam? First, confirm your smartphone is connected to a 2.4GHz WiFi network, as many dash cams don’t support 5GHz.
Ensure the dash cam’s WiFi is enabled in the settings – consult your manual for specific instructions.
Restart both your dash cam and smartphone.
Verify you’re entering the correct WiFi password.
Check for app updates; an outdated app may cause connection failures.

Maintenance and Care
Regular cleaning of the lens with a soft cloth ensures optimal video clarity. Keep the device updated with the latest firmware, and store it in a cool, dry place.
Cleaning the Lens
Maintaining a clear lens is crucial for optimal video quality. Regularly inspect the lens for dust, fingerprints, or smudges that can obstruct the view.
Use a soft, lint-free microfiber cloth to gently wipe the lens in a circular motion.
Avoid using harsh chemicals, abrasive cleaners, or paper towels, as these can scratch the lens surface.
For stubborn marks, slightly dampen the cloth with distilled water, ensuring no liquid enters the dash cam’s housing.
Consistent lens cleaning guarantees clear recordings.
Firmware Updates
Regular firmware updates are vital for maintaining optimal dash cam performance and accessing new features. Manufacturers frequently release updates to improve stability, fix bugs, and enhance functionality.
Check the manufacturer’s website or smartphone app (if applicable) for available updates.
Follow the instructions carefully during the update process, ensuring a stable power supply to prevent interruption.
A failed update could render the device unusable, so avoid disconnecting power during installation.
Updating ensures your dash cam operates efficiently.
Storage and Temperature Considerations
Extreme temperatures can significantly impact dash cam performance and longevity. Avoid prolonged exposure to direct sunlight or freezing conditions when the device is not in use;
High heat can damage the battery and internal components, while extreme cold may affect recording quality.
Store the dash cam in a cool, dry place when not installed in the vehicle.
Proper storage extends the lifespan of your device, ensuring reliable operation. Always consult the manual for specific temperature ranges.
Safety Precautions
Always prioritize safe driving. Review legal regulations regarding dash cam usage in your area, and understand the device doesn’t guarantee evidence.
Follow proper usage guidelines for optimal performance.
Legal Considerations and Regulations
Before using your FHD 1080p dash cam, familiarize yourself with local and state laws regarding recording in public and private spaces.
Some jurisdictions may require visible notification that recording is in progress, or restrict audio recording without consent.
Understand that dash cam footage may be subject to privacy laws and admissibility as evidence varies.
Always check current regulations to ensure compliance and avoid potential legal issues. Refer to your local DMV or legal counsel for clarification.
Proper Usage Guidelines
To maximize your FHD 1080p dash cam’s effectiveness, ensure the lens is clean and unobstructed for clear recordings.
Regularly format the microSD card to maintain optimal performance and prevent recording errors.
Position the camera securely, avoiding direct sunlight or reflections.
Review footage periodically to confirm proper operation. Avoid distractions while driving and prioritize safe operation of your vehicle above all else.
Dash cam footage may be valuable, but it’s crucial to understand its limitations as legal evidence.
Video quality can be affected by lighting, weather, and camera positioning.
Always consult with legal counsel regarding the admissibility of footage in court.
The manufacturer assumes no responsibility for the outcome of any legal proceedings. Proper storage and handling of files are your responsibility, ensuring chain of custody if needed.